Rust Vending Machine Raid Cost (2025 Update): Satchels, C4, and Rocket Guide
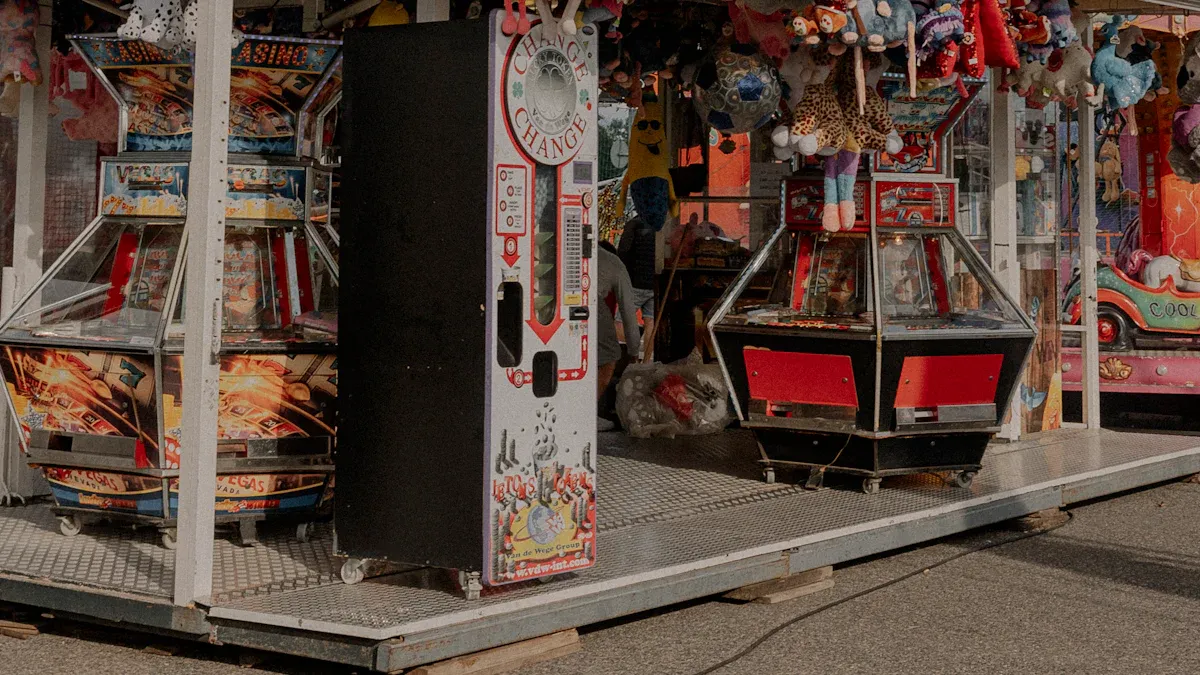
Vending Machine Raid Cost Summary (Quick Answer)
Rust vending machine raid costs:
• 10 Satchel Charges = 4,800 Sulfur
• 2 C4 = 4,400 Sulfur
• 4 Rockets = 5,600 Sulfur
(C4 is the most sulfur-efficient method.)
Key Takeaways
Pick the right explosive for your raid. C4 works fast, but Satchel Charges are cheaper and more dangerous.
Plan your supplies wisely. For example, 10 Satchel Charges need about 4,800 sulfur.
Always carry extra explosives. Raids can change quickly, and running out can put you in danger.
Look around the area before raiding. Watch for other players and raid during quiet times to stay hidden.
Have a backup plan ready. If your raid fails, gather your team and think about making a small base or trying again.
Types of Explosives and Their Costs in Rust

Satchel Charges
Crafting cost and resource requirements
Satchel Charges are one of the most accessible explosives in Rust. To craft one, you’ll need 480 sulfur, along with other resources like cloth and small stashes. If you’re planning to raid a vending machine, you’ll need around 10 Satchel Charges, which means you’ll spend approximately 4,800 sulfur in total.
Here’s a quick breakdown of the crafting cost:
Item | Damage | Crafting Cost (Sulfur) |
|---|---|---|
Satchel Charge | 75 | 480 |
Effectiveness against vending machines
Satchel Charges deal moderate damage to vending machines, making them a decent option for raiding. However, they can be unpredictable. Sometimes, they fail to detonate or take longer to explode, which might slow you down during a raid. If you’re looking for a budget-friendly option and don’t mind the risk, Satchel Charges are worth considering.
Timed Explosive Charges (C4)
Crafting cost and resource requirements
C4 is a powerful explosive, but it comes at a higher cost. Crafting one requires 20 explosives, 5 cloth, and 2 tech trash. To destroy a vending machine, you’ll need 2 C4s, which translates to a significant investment in resources.
Here’s a detailed look at the cost:
Item | Cost (Resources) | Damage Output |
|---|---|---|
C4 | 20 explosives, 5 cloth, 2 tech trash | 550 damage |
Effectiveness against vending machines
C4 is highly effective, delivering 550 damage per charge. With just two charges, you can completely destroy a vending machine. It’s reliable and quick, making it a great choice if you want to minimize your time spent raiding. However, the high cost of explosives makes it less appealing for players with limited resources.
Rockets
Crafting cost and resource requirements
Rockets are another powerful option for raiding vending machines. Crafting one requires 10 explosives, 30 gunpowder, and 1 pipe. While the cost is slightly lower than C4, you’ll need more rockets to achieve the same result.
Here’s a summary of the cost and efficiency:
Explosive Type | Damage to Structures | Cost Efficiency |
|---|---|---|
Rocket | 247.6 | High |
Effectiveness against vending machines
Rockets deal 247.6 damage to structures, so you’ll need at least four to destroy a vending machine. They’re effective but less efficient compared to C4. Rockets are ideal for players who already have the materials or want to use them for multi-purpose raids.
Explosive Ammo
Crafting cost and resource requirements
Explosive ammo is a versatile option for raiding vending machines in Rust. It’s crafted using explosives, gunpowder, and metal fragments, making it a mid-tier choice in terms of cost. To craft one unit of explosive ammo, you’ll need:
10 gunpowder
1 metal fragment
1 explosive
If you’re planning to raid a vending machine, you’ll need around 63 explosive rounds to destroy it. This translates to a total cost of 630 gunpowder, 63 metal fragments, and 63 explosives. While this might seem like a lot, explosive ammo offers flexibility since you can use it with weapons like assault rifles or semi-automatic rifles.
Here’s a quick comparison of crafting costs for different explosives:
Explosive Type | Crafting Cost | Damage Efficiency |
|---|---|---|
C4 | High | Most efficient against high-value structures |
Rockets | Moderate | Ideal for splash damage against multiple targets |
Satchel Charges | Low | Cheaper but riskier, can fail to explode |
Beancan Grenades | Very Low | Unreliable but useful in emergencies |
💡 Tip: If you already have a stockpile of gunpowder and metal fragments, explosive ammo can be a cost-effective option for smaller raids.
Effectiveness against vending machines
Explosive ammo deals 15 damage per shot to vending machines. While it’s not as powerful as C4 or rockets, it has its advantages. You can fire it from a distance, keeping yourself safe from potential counterattacks. Plus, it’s more precise, allowing you to conserve resources by targeting specific weak points.
However, using explosive ammo requires patience. You’ll need to fire multiple rounds to destroy the vending machine, which can take time. If you’re in a hurry or worried about being spotted, this might not be the best option. But if you’re looking for a flexible and reusable explosive, explosive ammo is worth considering.
🔧 Pro Tip: Pair explosive ammo with a silencer to reduce noise and avoid drawing attention during your raid.
Durability and Explosive Requirements for Vending Machines
Health Points (HP) of vending machines
Vending machines in Rust are tougher than they look. Their health points (HP) were recently increased by 25%, making them more durable against attacks. This change means you’ll need more firepower to break through their defenses.
Vending machines in Rust have had their health increased by 25%. Additionally, when destroyed, they will no longer drop any of their contents.
This durability upgrade makes vending machines a safer option for storing items but a bigger challenge for raiders. If you’re planning a raid, you’ll need to factor in this extra resilience when choosing your explosives.
Explosive damage required to destroy a vending machine
To destroy a vending machine, you’ll need explosives that deal 500 damage or more. Each type of explosive has its own damage output, so picking the right one is key. For example:
Satchel Charges: Each charge deals 75 damage, requiring 10 charges to destroy a vending machine.
C4: With 550 damage per charge, you’ll only need 2 charges to finish the job.
Rockets: Each rocket delivers 247.6 damage, so you’ll need 4 rockets to break through.
Explosive Ammo: Each round deals 15 damage, meaning you’ll need 63 rounds to destroy the vending machine.
Knowing the damage output of each explosive helps you plan your raid efficiently. If you’re short on resources, you might opt for Satchel Charges or Explosive Ammo. But if speed is your priority, C4 is the way to go.
Comparison of explosives and their efficiency
Not all explosives are created equal. Some are more cost-effective, while others save time. Here’s a quick comparison:
Explosive Type | Damage Output | Efficiency | Best Use Case |
|---|---|---|---|
C4 | 550 | High | Quick raids with minimal effort |
Rockets | 247.6 | Moderate | Multi-target raids |
Satchel Charges | 75 | Low | Budget-friendly option |
Explosive Ammo | 15 | Versatile | Precise and reusable |
If you’re looking for speed and reliability, C4 is your best bet. Rockets work well for splash damage, while Satchel Charges are great for players on a budget. Explosive Ammo offers flexibility, especially if you already have the materials. Choose the explosive that fits your resources and strategy, and you’ll be ready to raid efficiently.
💡 Tip: Always carry extra explosives in case your calculations are off or you face unexpected resistance during the raid.
Calculating the Cost of Explosives for Raiding
Cost breakdown for each type of explosive
Understanding the cost of explosives is crucial for planning your raid. Each type of explosive in Rust has a unique crafting cost, which depends on the resources required. Here's a detailed breakdown:
Explosive Type | Crafting Cost | Damage Output |
|---|---|---|
Timed Explosive Charge | 20 explosives, 5 cloth, 2 tech trash | 550 |
Rockets | 10 explosives, 150 gunpowder, 2 metal pipes | 350 |
Satchel Charge | 4 beancan grenades, 1 rope | 75 |
For example, crafting a single C4 requires a significant investment in tech trash and explosives, while Satchel Charges are more affordable but less powerful. If you're aiming for efficiency, knowing these costs helps you decide which explosive fits your strategy.
Most cost-effective explosive option
When it comes to cost-effectiveness, Satchel Charges often stand out. They require fewer rare materials, making them a budget-friendly choice. However, their unpredictability can be a drawback. If you’re looking for reliability, C4 is the best option despite its higher cost. It delivers the most damage per unit, allowing you to destroy a vending machine with just two charges.
Rockets fall somewhere in between. They’re versatile and can be used for multi-target raids, but they’re not as efficient for single vending machines. Explosive ammo, while flexible, requires a lot of rounds to achieve the same result, making it less cost-effective for this specific task.
💡 Tip: If you’re low on resources, Satchel Charges are your go-to. But if you want speed and reliability, invest in C4.
Time and resource considerations for crafting
Crafting explosives takes time and resources, so you’ll need to plan ahead. For instance, crafting a single C4 requires 20 explosives, which means you’ll need to gather a large amount of sulfur and gunpowder. Rockets also demand a significant amount of gunpowder and metal pipes, which can take time to collect.
Satchel Charges, on the other hand, are quicker to craft since they use more common materials like beancan grenades and rope. However, their lower damage output means you’ll need more of them, which could offset the time saved in crafting.
If you’re short on time, consider using pre-crafted explosives or trading with other players. This approach can save you hours of resource gathering and crafting.
🔧 Pro Tip: Always calculate the total time and resources needed before starting your raid. This ensures you’re fully prepared and reduces the risk of running out of supplies mid-raid.
Strategies for Efficient Raiding in Rust
Resource management and preparation
Efficient raiding starts with solid preparation. You need to gather enough resources to craft the explosives required for your target. Always bring more than you think you’ll need. Raids can be unpredictable, and running out of explosives mid-raid can leave you vulnerable.
Here’s a quick guide to matching explosives with structure types:
Structure Type | Explosive Type Needed | Notes |
|---|---|---|
Wooden Walls/Doors | Basic Explosives | Easy to break through, early-game defense. |
Stone/Metal Structures | Rockets or C4 | Requires higher-tier explosives. |
Armored Walls | C4 or Rockets | Most fortified, needs significant resources. |
💡 Tip: Control the Tool Cupboard (TC) in the area you’re raiding. This gives you access to the building and prevents others from rebuilding defenses.
Understanding wall durability also helps. For example, attacking the "soft side" of a wall takes fewer explosives than the "hard side." This strategy can save you both time and resources.
Choosing the right explosive for the situation
Not all explosives are created equal. Picking the right one depends on your target and available resources. C4 is the most efficient for high-value structures like metal walls or armored doors. Rockets work best for splash damage, especially when dealing with multiple layers. Satchel Charges are cheaper but riskier since they can fail to detonate.
Here’s a breakdown of explosive effectiveness:
Explosive Type | Effectiveness Description |
|---|---|
C4 (Timed Explosive Charge) | Most efficient for destroying high-value structures like metal walls or armored doors. |
Rockets | Ideal for splash damage, especially against multiple structures or layers. |
Satchel Charges | Cheaper but riskier; can fail to explode or take longer than expected. |
Beancan Grenades | Low-tier explosives; unreliable but useful in emergencies. |
🧨 Pro Tip: Use rockets when raiding bases with multiple layers. Their splash damage can hit several walls at once, saving you explosives.
Tips for avoiding detection during a raid
Stealth is key to a successful raid. Loud explosions can attract other players, so plan your attack during off-peak hours when fewer players are online. Using silencers with explosive ammo can also help reduce noise.
Here are some tips to stay under the radar:
Scout the area: Check for nearby players or bases before starting your raid.
Use cover: Hide behind trees, rocks, or other structures to avoid being spotted.
Bring backup: A teammate can watch your back while you focus on the raid.
🔧 Note: Always have an escape route planned. If things go south, you’ll need a quick way out to avoid losing your loot.
By managing resources wisely, choosing the right explosives, and staying stealthy, you can maximize your chances of a successful raid.
Backup plans in case of failure
Even the best-laid plans can go sideways during a raid. That’s why having a solid backup plan is essential. If things don’t go as expected, you’ll want to regroup, recover, and possibly turn the situation in your favor. Here are some strategies to help you bounce back from a failed raid.
Build a temporary base: Setting up a small, hidden base near your target can save you a lot of trouble. If you get killed or run out of supplies, this base gives you a safe spot to respawn and restock. Keep it stocked with extra weapons, explosives, and healing items. It’s like having a second chance without starting from scratch.
Engage in counter-raiding: Sometimes, the tables can turn. If another group tries to take advantage of your failed raid, you can counter-raid them. This strategy not only protects your loot but might even let you walk away with extra resources. Stay alert and use the chaos to your advantage.
💡 Pro Tip: Always keep a stash of backup gear in your main base. Losing everything in one raid can set you back significantly.
Plan an escape route: Before you start a raid, map out a quick way to retreat. Whether it’s a nearby forest, a river, or even a hidden tunnel, knowing where to run can save your life. Don’t wait until you’re under fire to figure this out.
Communicate with your team: If you’re raiding with friends, make sure everyone knows the fallback plan. Clear communication can prevent panic and keep the group organized during a retreat.
A failed raid doesn’t have to mean total defeat. With a little preparation and quick thinking, you can turn a setback into an opportunity. After all, in Rust, survival is all about adapting to the unexpected.
Exploring the Concept of Unmanned Stores in Rust
How cloudpick's Unmanned Store concept relates to vending machines
Have you ever thought about how vending machines in Rust mirror real-world technology? In Rust, vending machines act as unmanned stores, allowing players to trade items without needing a shopkeeper. This concept is strikingly similar to cloudpick's Unmanned Store, which operates without human intervention. Just like vending machines in Rust, cloudpick's stores use advanced technology to handle transactions seamlessly.
Cloudpick's Unmanned Store takes this idea to the next level. It uses AI-powered systems to monitor inventory, prevent theft, and even personalize shopping experiences. Imagine if Rust's vending machines could automatically restock or adjust prices based on demand. That’s the kind of innovation cloudpick brings to the table. While Rust’s vending machines are simple, they share the same core idea: efficiency and automation.
💡 Fun Fact: Both Rust’s vending machines and cloudpick’s Unmanned Store aim to save time and resources, making them perfect for their respective worlds.
Drawing parallels between Rust's vending machines and real-world AI-powered retail solutions
Rust’s vending machines and cloudpick’s Unmanned Store share more similarities than you might think. Both rely on automation to simplify transactions. In Rust, vending machines let you buy and sell items without interacting with other players. Similarly, cloudpick’s stores use AI and sensors to create a contactless shopping experience.
Here’s a quick comparison:
Feature | Rust Vending Machines | Cloudpick's Unmanned Store |
|---|---|---|
Human Interaction | None | None |
Inventory Management | Manual | AI-driven |
Theft Prevention | Limited | Advanced anti-theft tech |
Both systems prioritize convenience. However, cloudpick’s Unmanned Store offers a more sophisticated approach, making it a game-changer in real-world retail.
Leveraging cloudpick's insights for efficient resource management in Rust
You can learn a lot from cloudpick’s approach to efficiency. In Rust, managing resources is critical for survival. Cloudpick’s Unmanned Store uses real-time monitoring and smart replenishment to ensure shelves are always stocked. You can apply this mindset in Rust by keeping your vending machines well-stocked and strategically placed.
Think about location. Cloudpick’s stores are designed for accessibility, just like vending machines in high-traffic areas in Rust. Placing your vending machines near popular spots can maximize profits. Also, consider using Rust’s vending machine map to track and manage your trade routes, much like cloudpick uses data to optimize operations.
🔧 Pro Tip: Treat your vending machines like a business. Monitor what sells best and adjust your stock to meet demand. Efficiency is key to staying ahead in Rust.
Raiding a vending machine in Rust requires careful planning and the right tools. You’ll need to choose between explosives like Satchel Charges, C4, Rockets, or Explosive Ammo, depending on your resources and strategy. For example, using 10 Satchel Charges costs around 4,800 sulfur, while 2 C4s cost about 4,400 sulfur. Knowing the exact cost of explosives helps you prepare efficiently and avoid wasting resources.
Planning is everything. Before a raid, gather enough materials, calculate the damage needed, and pick the most efficient explosive for the job. Resources like cost tables and damage charts can guide you in making smart decisions. Always bring extra supplies and have a backup plan in case things go wrong.
Interestingly, Rust’s vending machines mirror real-world innovations like cloudpick’s Unmanned Store. Both prioritize efficiency and automation. Just as cloudpick uses AI to optimize inventory and prevent theft, you can apply similar strategies in Rust by managing your vending machines wisely. Whether in gaming or real life, efficiency is the key to success.
FAQ
What’s the cheapest explosive to raid a vending machine in Rust?
Satchel Charges are the most affordable option. You’ll need 10 of them, costing around 4,800 sulfur. They’re budget-friendly but can be unreliable since they sometimes fail to detonate.
💡 Tip: Always carry extra Satchel Charges in case some don’t explode.
How many C4s do I need to destroy a vending machine?
You’ll need just 2 C4s to destroy a vending machine. Each C4 deals 550 damage, making it the fastest and most reliable option. However, crafting them requires rare resources like tech trash and explosives.
Can I use explosive ammo for vending machine raids?
Yes, but it’s less efficient. You’ll need 63 explosive rounds to destroy a vending machine. While it’s versatile and precise, it takes more time and resources compared to C4 or rockets.
How does cloudpick’s Unmanned Store compare to Rust’s vending machines?
Both focus on automation and efficiency. Rust’s vending machines simplify in-game trading, while cloudpick’s Unmanned Store uses AI to optimize real-world retail. Cloudpick’s advanced features like theft prevention and smart replenishment take automation to the next level.
What’s the best strategy for raiding vending machines?
Plan ahead. Choose the right explosive based on your resources. C4 is quick but costly, while Satchel Charges are cheaper but riskier. Always scout the area, bring extra supplies, and have an escape route ready.
🔧 Pro Tip: Use silencers with explosive ammo to stay stealthy during raids.
See Also
Understanding The Expenses Associated With Vending Machines
Pricing Insights For Personalized Vending Machines
Analyzing Vending Machine Prices: Key Features And Costs
Exploring Vending Machine Costs: Models, Features, And Returns