How Shelves and Product Layouts Should Be Planned for a Cashierless Store

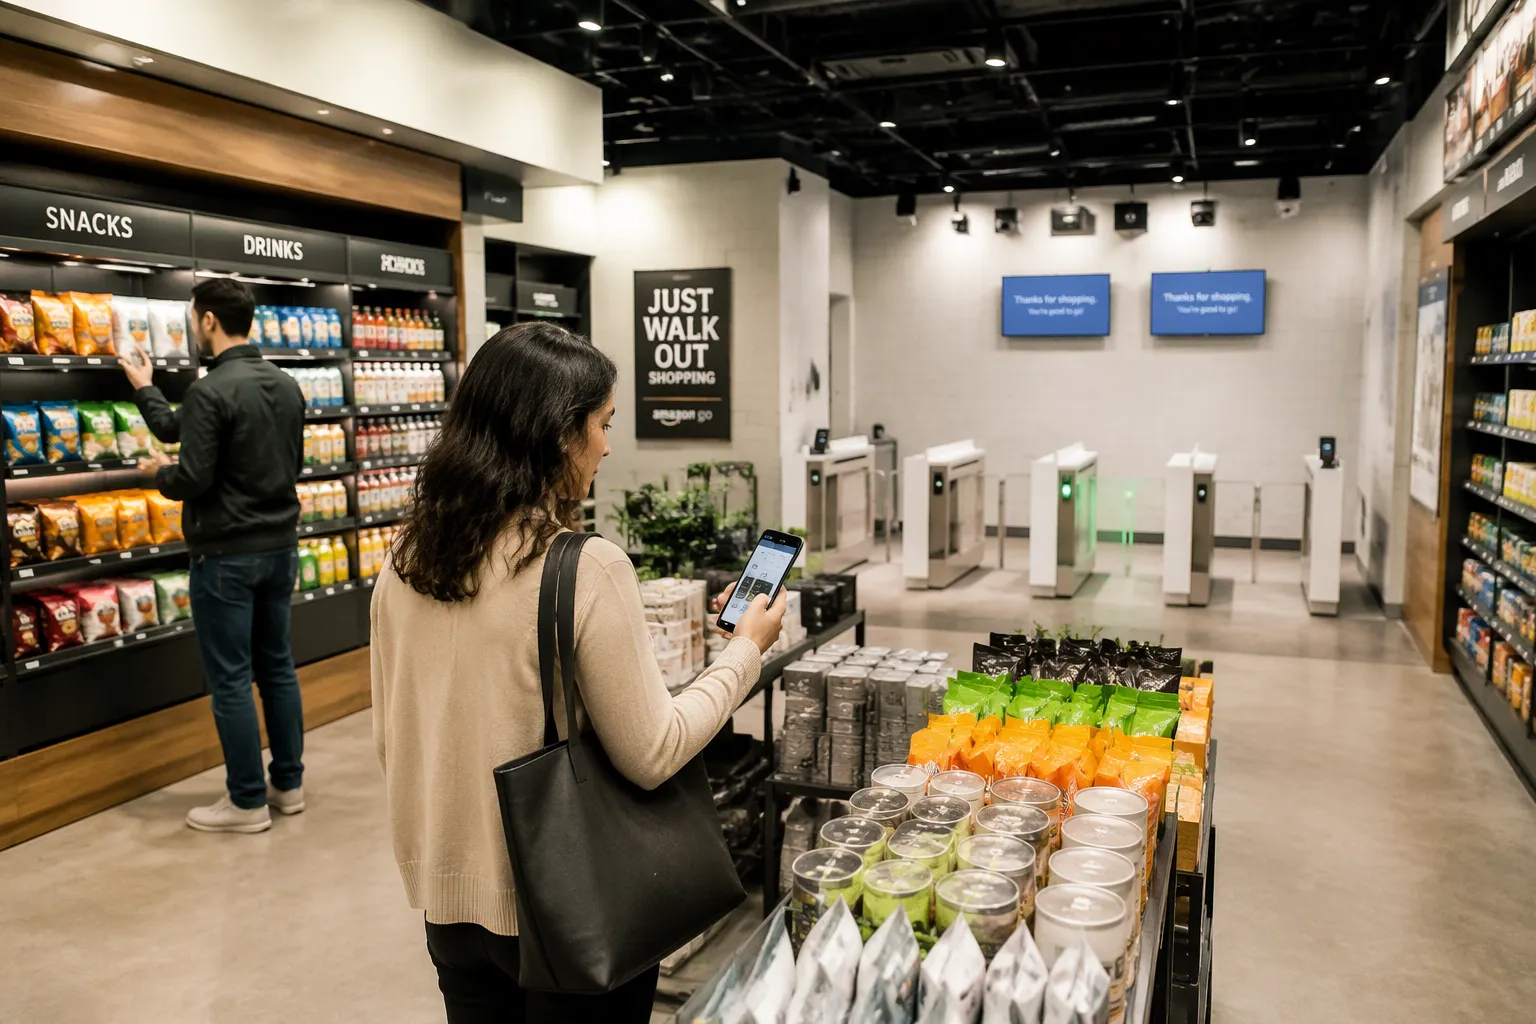
When you plan shelves and layouts in a cashierless store, you must focus on three key things: sensor coverage, clear product visibility, and predictable customer flow. These key things shape everything the technology can do. Recognition accuracy, loss prevention, restocking speed, and customer ease all depend on layout choices you make before anyone installs a fixture. A camera cannot identify a product it cannot see. A shopper cannot move smoothly through an aisle that fights the traffic pattern. Shelves and Product Layouts therefore need careful planning, not guesswork. This article gives store planners, operations managers, and solution providers a practical planning sequence. You can follow it step by step, from the first floor plan review to the final data-driven refinement.
Key Takeaways
Set up shelves so cameras can see every product and sensor coverage is complete.
Pick shelf types and spacing that fit product height and camera views.
Group products that look alike, and set clear facing rules for restocking.
Set up aisles and areas to help customers move easily and avoid crowding.
Use real store data to improve layouts and make them more accurate, faster, and smoother.
Plan Shelves and Product Layouts Around Sensor Coverage
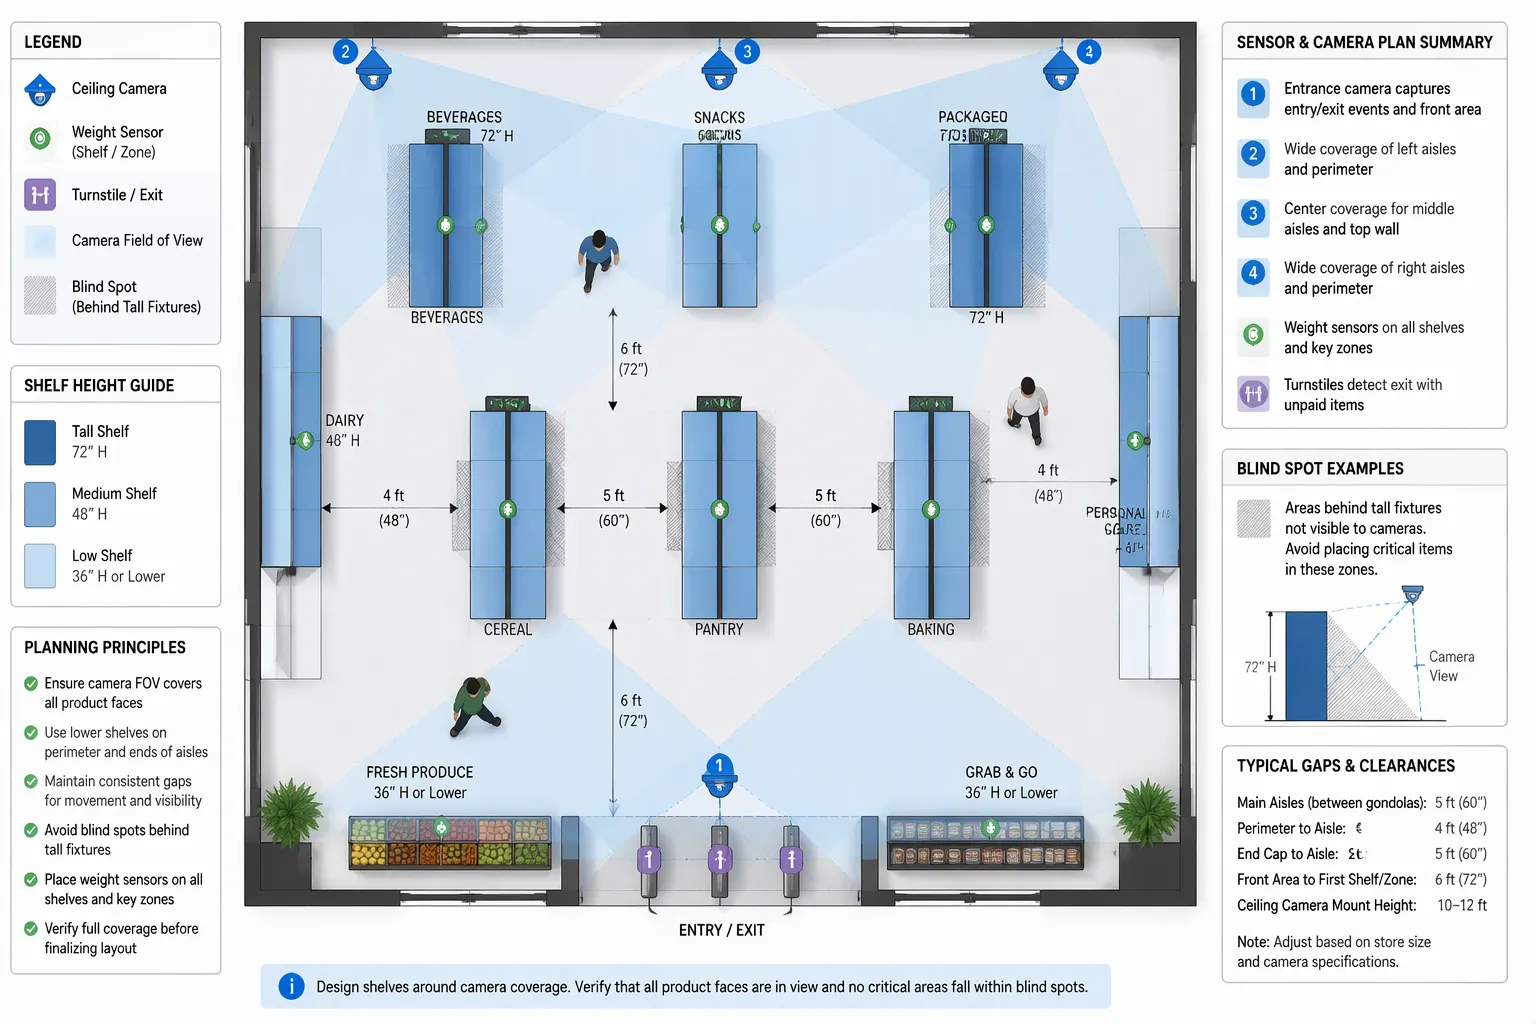
Start with the floor plan, not the fixture catalog. Analyze the empty space for the best placement of sensors, cameras, and turnstiles before you choose a single shelf. Each device has a field of view and a working range. Those limits define where fixtures can stand. A shelf that blocks a camera creates a permanent gap in recognition. A turnstile placed after the first aisle leaves the entrance zone unwatched. Walk the plan zone by zone and mark every device position first. Then draw the fixtures around those marks.
Set Shelf Heights and Gaps
Shelf arrangement must account for embedded technology. Some fixtures carry weight sensors, antennas, or smart labels inside the frame. Leave room for that hardware and for its wiring. Keep the top shelf below the camera line. A tall unit near a ceiling-mounted camera hides the rows behind it. Gaps between shelves matter just as much. Cameras need a clear line to the product face. A tight gap between two units creates a shadow zone that no lens can reach. Set consistent gaps along each run. This gives every camera a predictable view and makes the recognition model easier to train.
Map Blind Spots First
Map blind spots before you finalize the layout. Take the device plan and trace what each camera can see. Mark every area that falls outside a lens or behind a fixture. Treat each blind spot as a design problem, not an acceptable loss. You have three ways to close one. Move the fixture. Adjust the shelf height. Add a sensor or camera to cover the gap. Sightlines and gaps determine what cameras can reliably see, so test each change against the device plan. A short shelf at the end of a run may open a view into the next aisle. A lower unit near a corner may remove a shadow. Repeat this review until every product face sits inside at least one camera view. This step protects recognition accuracy and loss prevention at the same time. It also saves money later, because fixing a blind spot after installation costs far more than moving a shelf on paper.
Good sensor planning also shapes the rest of your Shelves and Product Layouts decisions. Once you know where the cameras point, you know which faces need the clearest sightlines. You know which rows can hold taller products. You know where to place high-value items for full coverage. Carry this device map into every later planning step. It becomes the reference for fixture choice, product grouping, and aisle design.
Choose Shelf Types and Spacing
Compare Fixture Options
Open shelving gives cameras and shoppers an unobstructed view of the product face. It suits fast-moving categories and any zone where recognition depends on a clear sightline. Glass fixtures protect high-value or fragile items and still let sensors read the front row. They fit best in locked or attended zones where security matters more than quick reach. Hybrid fixtures combine open bays with glass sections. Use them where one run holds both everyday goods and premium items. Each option has a place in your Shelves and Product Layouts plan. Match the fixture to the zone, the product, and the camera view you mapped earlier.
Match Spacing to Product Height
Set shelf spacing to the height of the products on that row. A gap that is too tall wastes vertical space and pushes the top row out of camera range. A gap that is too tight forces you to lay products on their side, and that hurts recognition. Measure your tallest item in each category and size the gap around it. Deeper rows need a slight tilt or a riser so the back stock stays visible. Stacked arrangements work well for small, uniform items. Keep the front face aligned and the stack stable. This approach keeps products visible, machine-readable, and easy to reach.
Group and Face Products for Accuracy
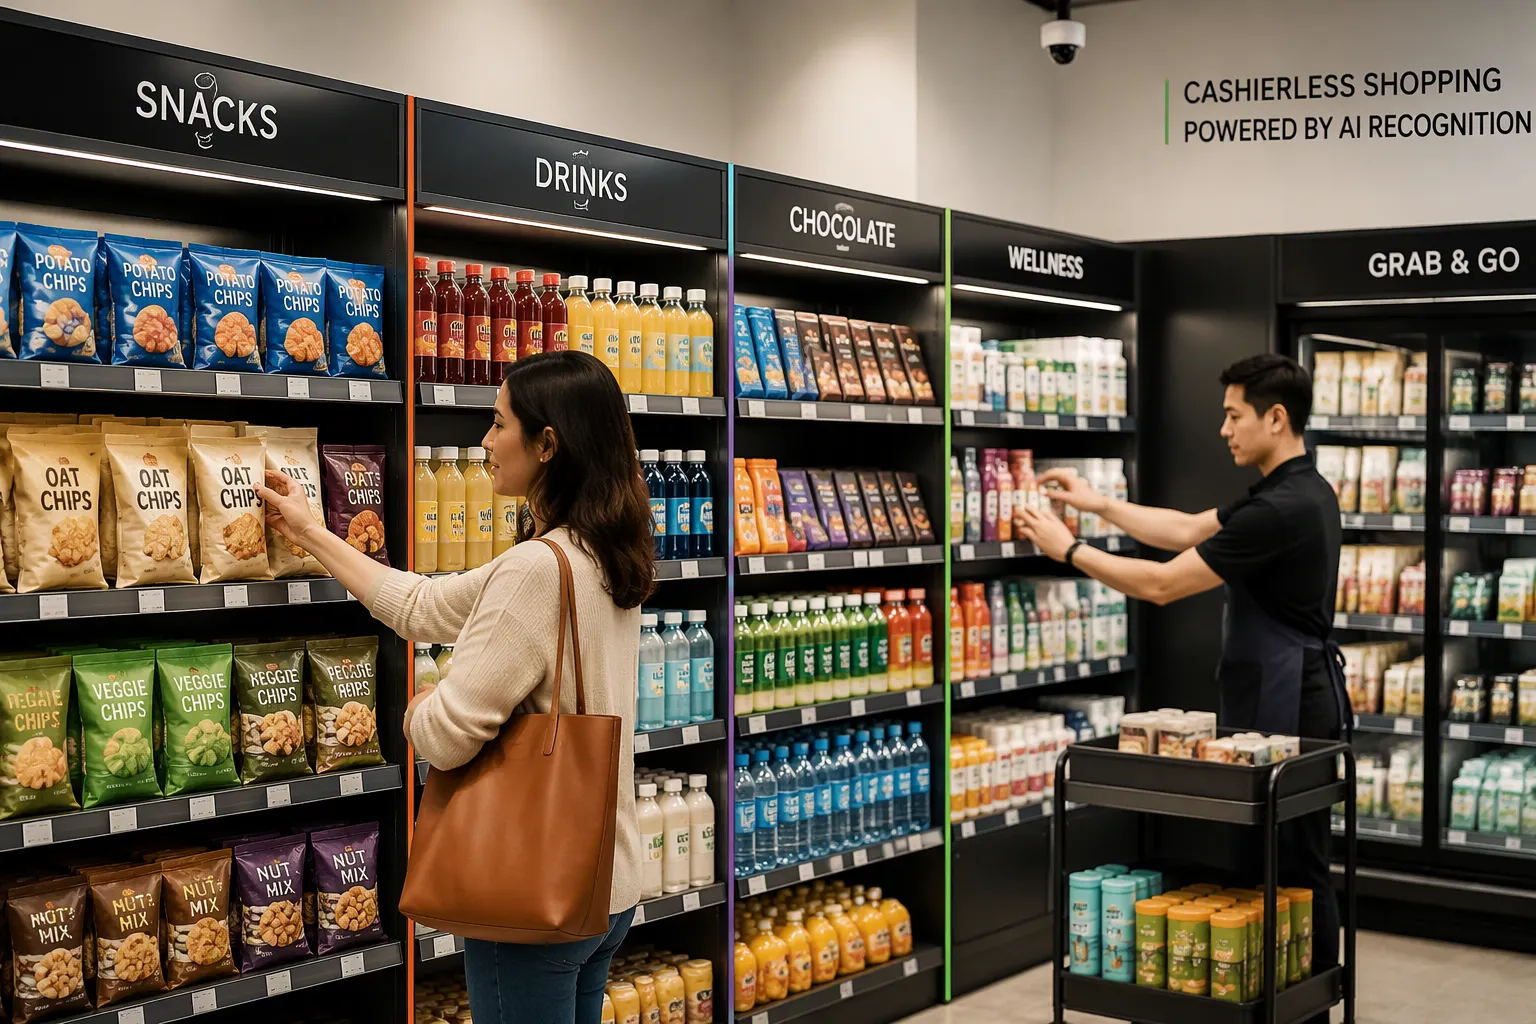
How you group products affects how well your recognition system works. A camera learns to identify items by their visual features. Products that look alike and sit next to each other confuse both the model and the shopper. Plan your grouping strategy before you stock the first shelf.
Group by Recognition Similarity
Group products by how they look, not just by category. Two brands of the same product often share size, shape, and color. Place them apart on the shelf or separate them with a visual marker. This gives the recognition system a clearer signal. It also helps customers grab the right item without a second look.
Shelf height matters in grouping too. Products for adults work best at shelf heights of 5 to 6 feet. This zone sits at eye level and catches the attention of adult shoppers. Products for kids belong at cart level. Children see these items as they walk beside a parent. This placement helps both recognition accuracy and natural shopping behavior.
Visual merchandising techniques can boost product visibility and customer engagement. Color blocking, consistent facing, and clear category breaks all guide the eye. They also give the camera steady visual anchors. A well-organized shelf reads clearly to a person and to a machine at the same time.
Set Facing Rules for Restocking
Facing rules keep the shelf consistent over time. Define how each product sits on the shelf: label forward, front edge aligned, stack height fixed. Write these rules into your restocking procedure. Staff then follow the same pattern on every shift.
Well-planned shelving makes restocking easier and cuts down on out-of-stocks. A clear facing standard tells staff exactly where each item belongs. They spot a gap faster and refill it before the shelf runs empty. Consistent facing also keeps the camera view stable. A product turned sideways or pushed to the back may fall outside the recognition zone.
Check your facing rules against the device map from your Shelves and Product Layouts plan. Any row with a narrow camera angle needs stricter facing discipline. Any row with a wide, clear view can handle more variation. Tie the rules to the sightline, and the shelf stays readable all day.
Train staff on the facing standard during onboarding. Post a simple reference at the restocking station. Check compliance during routine walks. Small habits at the shelf protect recognition accuracy and keep the customer experience smooth.
Design Aisles, Zoning, and Traffic Flow
Aisle design starts with a close look at your store. Check what your store can handle and how much space you have before you plan the floor plan. Measure the whole footprint, the entrance and exit points, and the fixed obstacles like columns, utility closets, and checkout zones. Smart zoning then improves customer flow and inventory management. Split the floor into zones by function: entrance, high-traffic staples, impulse areas, and destination categories. Give each zone a clear purpose. This zoning keeps shoppers moving and helps you put stock where it sells fastest.
Set Aisle Widths and Zoning
Set aisle widths based on the traffic you expect and the equipment you use. A main aisle needs enough room for two shoppers to pass with a cart, plus space for restocking carts. Secondary aisles can be narrower. Keep the width the same along a run. A sudden narrow spot slows the whole store and causes crowding near your best-selling items. Zone boundaries should follow the aisle structure. Put high-turnover categories along wide main aisles. Put slower categories in quieter zones. This split spreads foot traffic and reduces crowding at peak hours.
Align Shelving With Traffic Direction
Line up the shelving axis with your store's main traffic direction. Run shelf lines parallel to the path shoppers naturally take from the entrance toward hot-selling areas. This alignment pulls customers past more products with less effort. Angled or cross-running shelves can work as planned breaks, but use them sparingly. Never put shelving directly in front of fixed obstacles. A shelf that blocks a column or a doorway forces shoppers to backtrack and hides products from camera view. Leave clear space around every fixed obstacle. Check each shelf line against your device map from the Shelves and Product Layouts plan. The aisle should guide the shopper and keep every product face inside a camera view at the same time.
Test Shelves and Product Layouts With Real Data
A layout that looks correct on paper still needs proof from the live store. Treat the first weeks after launch as a test period. Watch how the shelves perform, and keep your Shelves and Product Layouts plan open for revision.
Design Labels for People and Systems
Shelf labels must serve two audiences at once. A shopper reads the label to find a price and a product name. A camera reads the same label to anchor a product to a location. Design every label with both readers in mind. Use a large, high-contrast font. Keep the label flat and free of glare. Place it in the same spot on every shelf edge.
Test your labels under the store's actual lighting. A label that reads well in the office may wash out under bright ceiling lights. Check the label from the camera's angle, not just from eye level. Adjust size, color, or position until both the shopper and the system read it cleanly.
Iterate Using Store Data
Review three measures after launch: recognition accuracy, restocking speed, and customer flow. Pull recognition reports and find the rows with the most misreads. Walk those aisles and check the sightlines against your device map. Look for a shelf that blocks a view or a product that sits outside the camera zone.
Time your restocking runs and note where staff slow down. A confusing facing rule or a crowded bay adds minutes to every shift. Watch customer flow at peak hours too. A narrow spot or a misplaced end cap shows up as a bottleneck.
Refine the layout in cycles. Fix the biggest problem first, then measure again. Repeat this loop until the numbers hold steady. Each pass tightens accuracy, speed, and flow together.
Plan your store starting with where the sensors can see. Make sure every product stays visible and easy for machines to read. Group and face items using the same rules every time. Set up your aisles in zones so people move smoothly and loss prevention stays strong. Then use real store data to improve the layout. These planning rules work together as one connected system, not a checklist you finish once.
Think of layout planning as a cycle that keeps going. Recognition accuracy, restocking efficiency, and customer flow all come from the same Shelves and Product Layouts decisions. Measure, adjust, and measure again. Each round makes your store better.
FAQ
How tall can shelves be before cameras lose the top row?
Keep the top shelf below the camera line you mapped during planning. A unit that rises into the lens hides the rows behind it. Test each height against the device plan before you order fixtures. When in doubt, choose the lower option and add coverage with an extra sensor.
What aisle width works best for a cashierless store?
Size the main aisle for two shoppers with carts to pass, plus room for a restocking cart. Secondary aisles can run narrower. Keep the width constant along each run. A sudden narrow spot slows traffic and crowds your best-selling items. Measure your own equipment before you commit.
How do I handle products that look nearly identical?
Separate them on the shelf or place a visual marker between them. Two brands of the same item often share size, shape, and color, and that overlap confuses both the recognition model and the shopper. Spacing them apart gives the system a cleaner signal and helps customers grab the right item.
Do shelf labels need to change for a cashierless setup?
Yes. Every label serves two readers: the shopper and the camera. Use a large, high-contrast font, keep the label flat and glare-free, and place it in the same spot on every shelf edge. Test it under the store's real lighting from the camera's angle, not just at eye level.
How often should I revisit the layout after launch?
Treat the first weeks as a test period, then refine in cycles. Fix the biggest problem first, measure again, and repeat until the numbers hold steady. Recognition accuracy, restocking speed, and customer flow all improve together. Layout planning never truly finishes.
See Also
Cloudpick Delivers Seamless Cashierless Shopping Experience for Your Retail Store
Walgreens Self-Checkout Examines Retail Convenience and Its Ongoing Challenges
Micromarkets Versus Smart Stores: Automated Convenience Retail Operations Across the Globe
Walmart Self-Checkout Access Shifts: Key Changes Coming Throughout 2025
Why AI-Powered Retail Stores Represent the Future of Shopping
